This post is one part of a series on how to incorporate 5 aspects of the Steiner kindergarten program into your Waldorf home. Today we will focus on a ‘time to work’ by baking bread. For an overview of the 5 aspects, click here.
Children love to make form. It doesn’t matter whether it is building sandcastles, squishing mud or modelling clay – they love to create form out of malleable material. My toddler is no exception – he could play in the sandpit for hours!
Another way to nourish their love of creating form is by baking bread. This activity also taps into the child’s desire to contribute to the home environment and their will to imitate adult work.

Bread Activities and the 12 Senses
Bread baking in the Waldorf kindergarten is a favourite activity for many toddlers and young children. From watching the dough rise during morning play, to kneading the dough, adding detail to the bread rolls and finally eating it – it is such a nourishing sensory activity. Bread baking is also easily completed in the home environment.
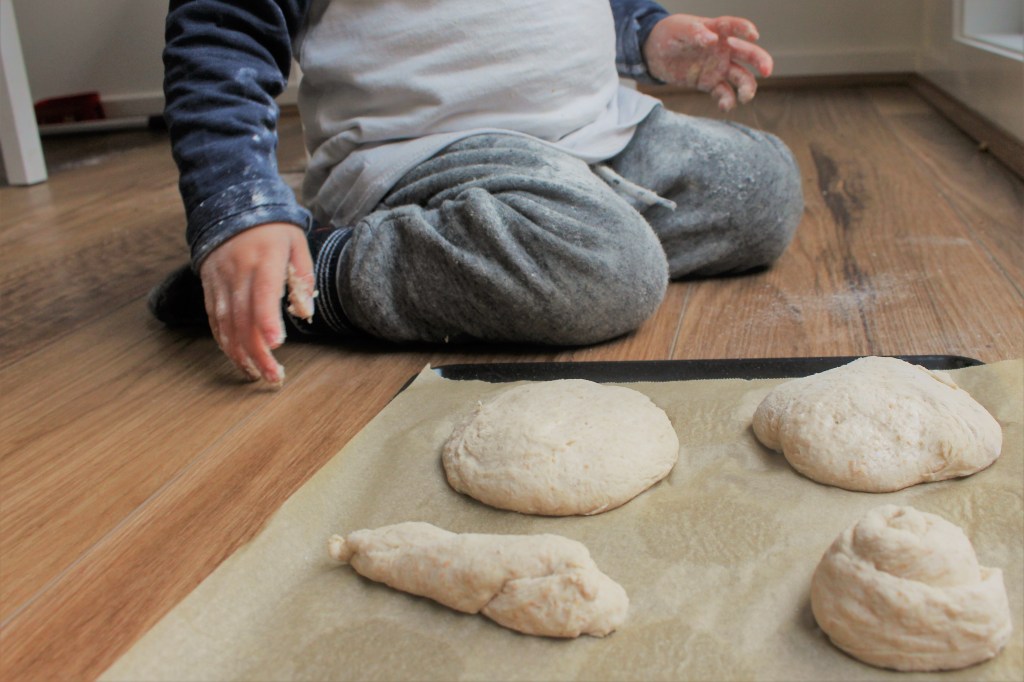
Many senses are engaged during the bread baking process. The activity of kneading the dough stimulates the muscles of the entire hand and engages the sense of touch. It allows the child to push up against a boundary and feel the resistance of the substance. It encourages them to develop an understanding of how much pressure to use to mould the dough, thereby engaging the sense of balance. Children often produce detailed creations which work their fine motor skills. Smelling the bread baking and then finally eating it, provides a rich sensory experience for the smell and taste receptors. Seeing the task of baking the bread through from start to finish engages the child’s sense of life force.

Waldorf Kindergarten Bread Recipe
When I am baking bread with my toddler I make the dough straight after breakfast. Sometimes he will come to help, other times he is too busy playing. In the Waldorf kindergarten schedule the dough is generally made by an assistant during free play and the children may come to help. If you are inviting your child to help you make the dough I recommend having all ingredients, bowls and utensils laid out prior to starting. This will make the process smoother, and hopefully, less messy!
This recipe is a mix of various recipes which I found online. Feel free to swap the rye flour out for a different one, or replace it with one more cup of plain flour. This recipe will produce about 24 small bread rolls. For a printable version of this recipe click here.
Ingredients
- 7g active dry yeast
- 2 cups warm water
- 3 cups plain flour
- 1 cup rye flour
- 1 teaspoon salt
- 3 teaspoons coconut sugar
- Preheat the oven to 180C.
- Put the warm water into a medium sized bowl. Make sure it is not too hot or too cold, it should be just warm to touch.
- Sprinkle the yeast into the water. There’s no need to stir it.
- While the yeast is activating, add the dry ingredients to a large bowl. Whisk thoroughly to get rid of any lumps.
- By this time the yeast should be bubbling or fizzing slightly, add the yeast mixture into the flour mix.
- Mix the dough with a spoon, then use your hands to knead and ensure it is well combined.
- Cover the dough and leave it to rise in a warm place for 30 mins – 1 hour or until it has doubled in size.
- Prepare a baking tray and line it with paper. If you are baking with a group of children you may want to prepare name tags. Write each child’s name on an A4 sheet of paper and cut them out. You can place these name tags under one edge of the child’s bread roll.
- This is the fun part and where children can really get involved. Sprinkle your kneading surface and children’s hands with flour. Have extra flour on hand in case your dough is too sticky. Knead the dough again and break off a small ball for each child. This is a lovely time to sing a baking song such as ‘Pat-A-Cake, Pat-A-Cake’ or ‘Hot, Brown Loaf’ from Shea Darian’s Seven Times The Sun.
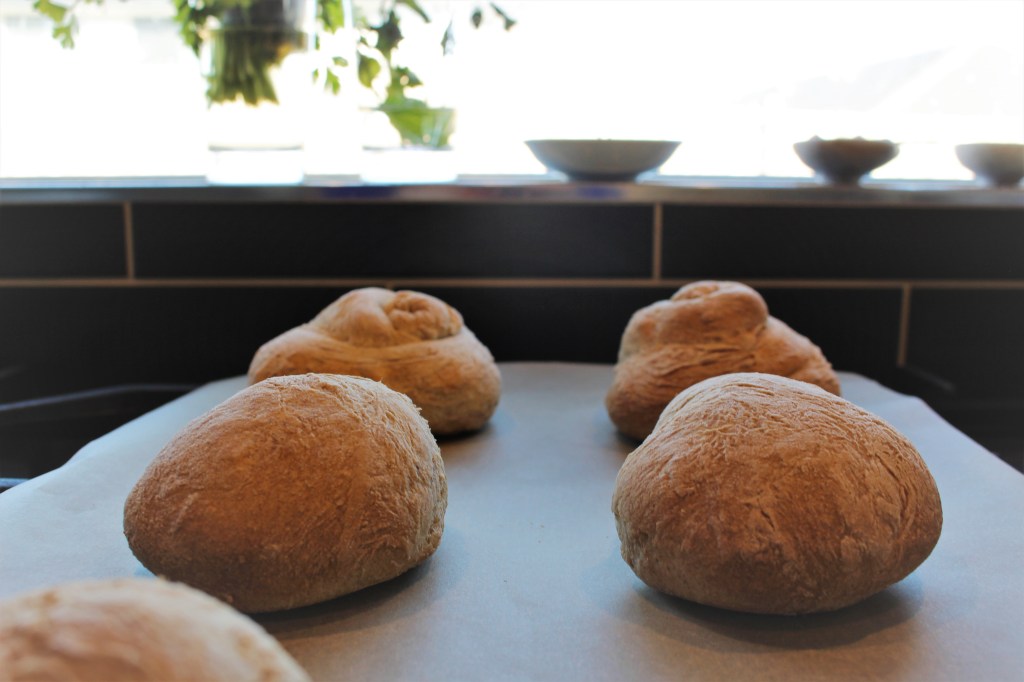
- Demonstrate how to knead the dough through your actions. Once you have finished kneading, roll your dough into a ball (or other shape of your choice) for baking. Older children may like to create different shapes or detailed patterns on their bread rolls.
- Place bread rolls on a lined tray and leave to rise for another 15 minutes.
- Bake at 180C for 25 minutes until the rolls are golden brown.
- Let them cool for 10 minutes and then enjoy. They are delicious with warm soup during winter or butter and honey in the warmer months.
Let me know if you try this recipe.